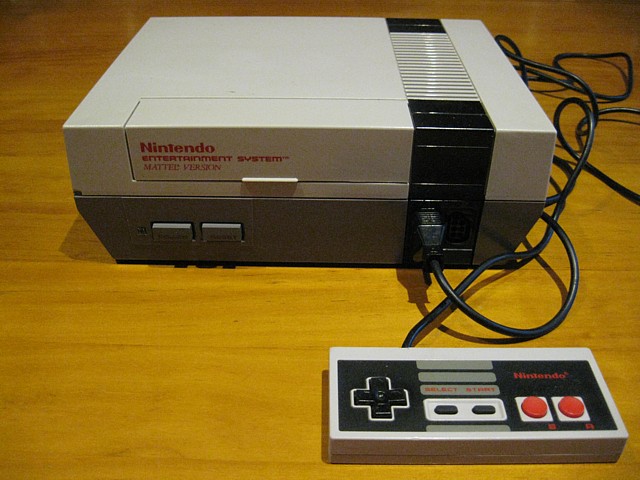
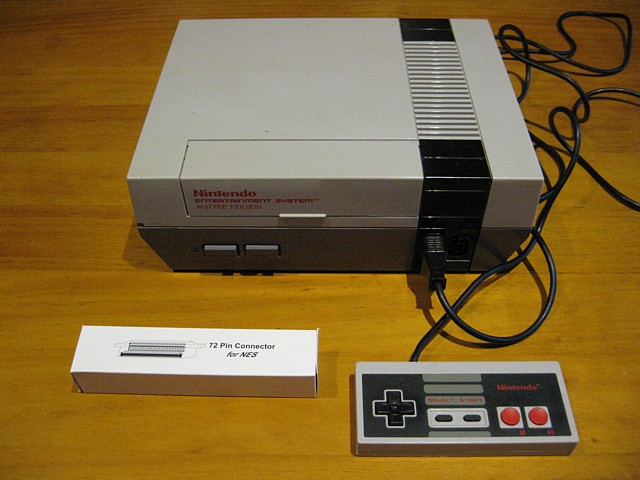
Nintendo Entertainment System, Mattel version 'Toaster'
After the Video Game Crash, the release of the NES (a repackaged version of Nintendo Japan's Famicom or Family Computer) marked the start of the Third Generation of Video Games. Known as the 8 bit era, although previous second generation consoles also used 8 bit microprocessors the NES and consoles which followed realised their full potential with improved graphics and sound hardware to match.
To shrug off the poor image which video games had developed (largely as a result of unlicensed and mediocre third party software flooding the market during the later stages of the Atari era) Nintendo of America repackaged the Famicom to appear as an entertainment unit rather than a video game.
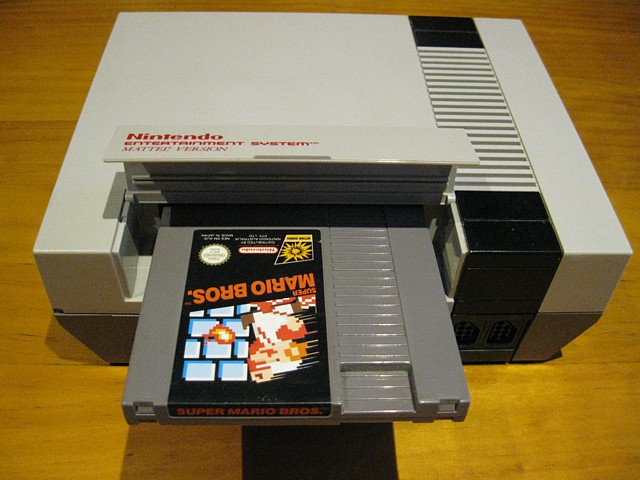
Intended to resemble the operation of the newly popular home VCR, a front opening flap allowed game cartridges to be slid into a horizontal slot and clicked down into place, making connection with the edge connector contacts. To complete the illusion, Nintendo referred to the unit as a 'Control Deck' avoiding the term 'Video Game' altogether. The public welcomed the new console but had their own take on the repackaged product and quickly dubbed it the 'toaster'.
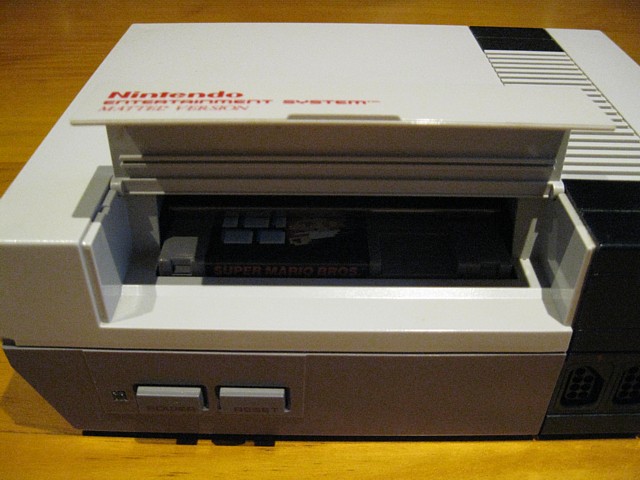
Another measure, to protect against unlicensed software was the inclusion of a proprietary chip in the console and every game cartridge which had to be detected to allow a game to load. Absence of the matching chip in a game cartridge caused the console to reset.
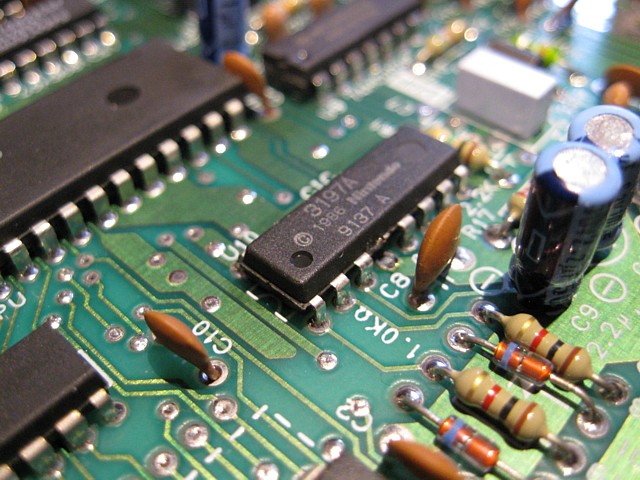
Unfortunately as the cartridge edge connectors wore and became less reliable this added to instances of legitimate games failing to load. Causing the console to reset repeatedly, this behaviour was commonly referred to as the 'blinking light' problem. As a result, many systems such as this particular unit have had this feature disabled by simply cutting the pin on the chip which sends a signal to reset the processor, somewhat improving reliability.
Eventually, most units require the spring loaded edge connector to be replaced entirely and fortunately aftermarket parts are still readily available and inexpensive due to the continued popularity of original systems amongst enthusiasts.
Towards the end of its production life, Nintendo released a 'Top Loader' version of the NES which did away with the troublesome front loading mechanism as well as the proprietary chip, also (unfortunately) leaving off the AV outputs in favour of an RF-only output.
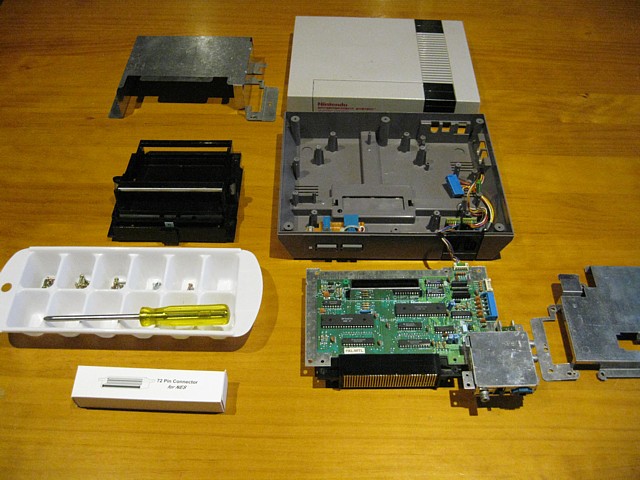
It's time to replace the 72 pin connector on this unit. Even after cleaning the edge connector contacts, some of the games which I have for it won't load at all and some are more likely to connect when the cartridge guide is in the 'up' position rather than latched down. It seems that the spring loaded contacts may have been badly 'readjusted' at some point in an attempt to improve the connections.
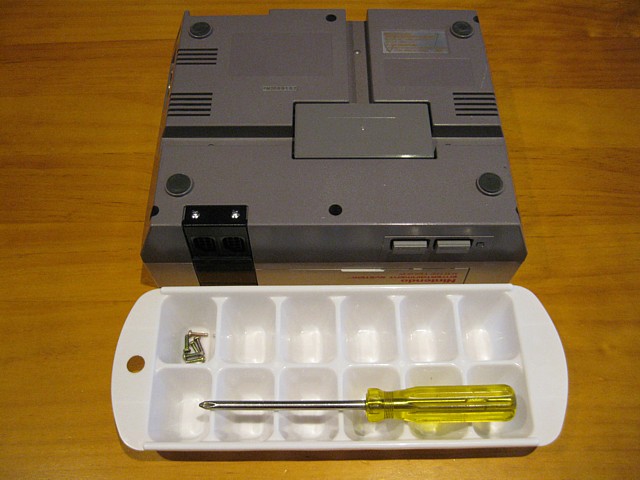
The only tool required is a Phillips head screwdriver. It's helpful to have a container of some sort handy to collect the screws as they are removed. These ice cube trays are ideal for grouping the different types. First, removing the six screws from the base.
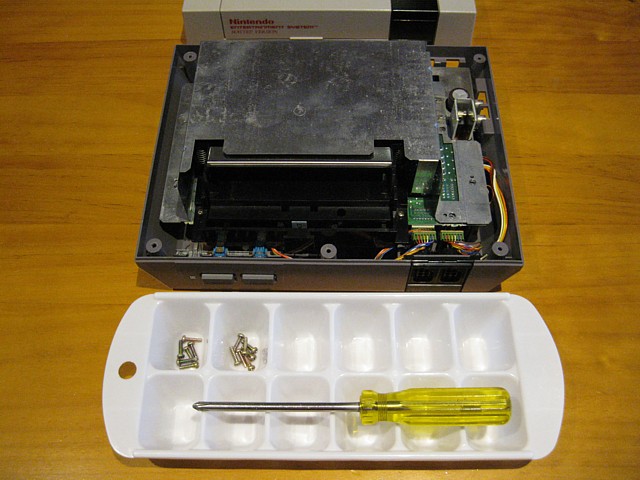
Turning it back over, the lid lifts right off. Next, the seven screws which retain the top shield plate. (these may vary depending on the exact model)
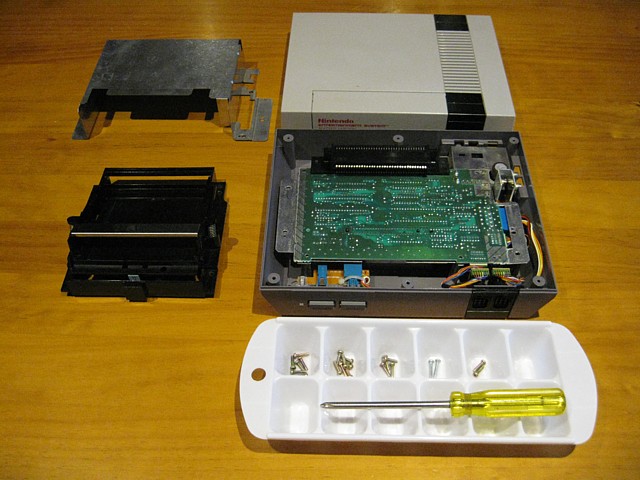
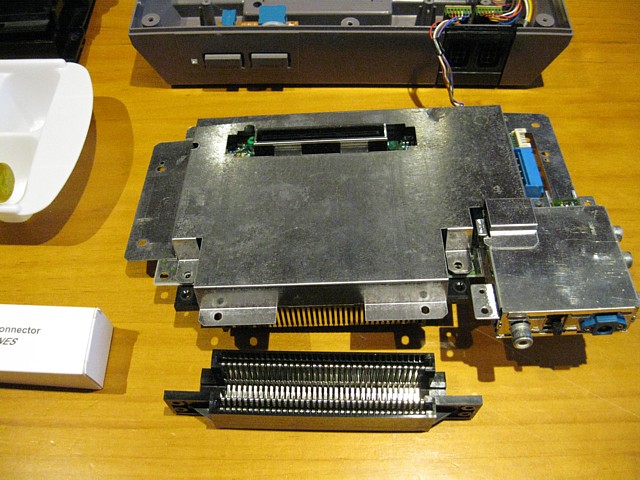
Now the six screws (two are slightly longer) which retain the cartridge guide and also the two screws, either corner of the modulator assembly which allows the board to be lifted and the cartridge guide slid off towards the front of the unit.
Unplugging the two connectors along the right hand side allows the board to be turned over and the bottom shield plate removed. I've left the Player 1 control cable connected to make sure none of the cables are inadvertently swapped.
Here, the old connector has been 'unplugged' from the PCB, the new one fitted and the bottom shield plate reinstated.
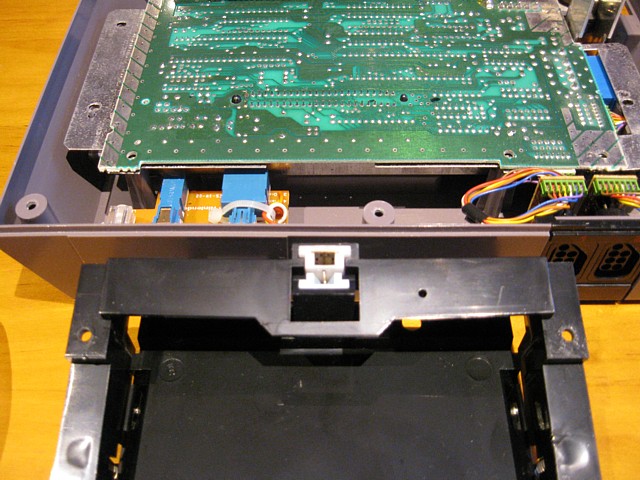
With the board back in place and looking at the underside of the cartridge guide, the prominent part facing inward at the centre must hook under the PCB when the guide is refitted. If it sits above, once screwed together the cartridge will not latch down.
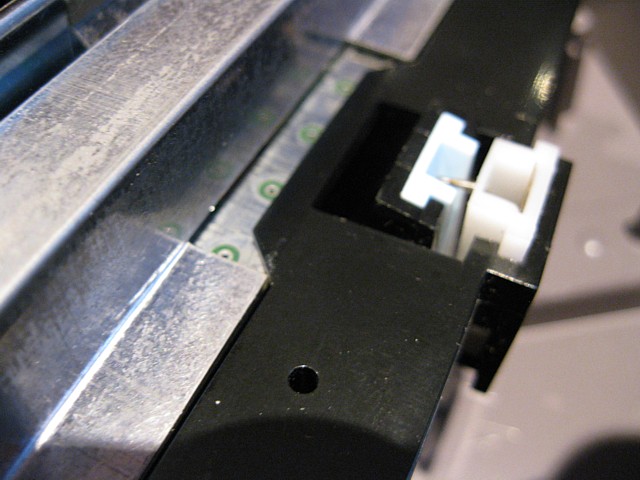
A close up view of the underside showing the correctly assembled items.
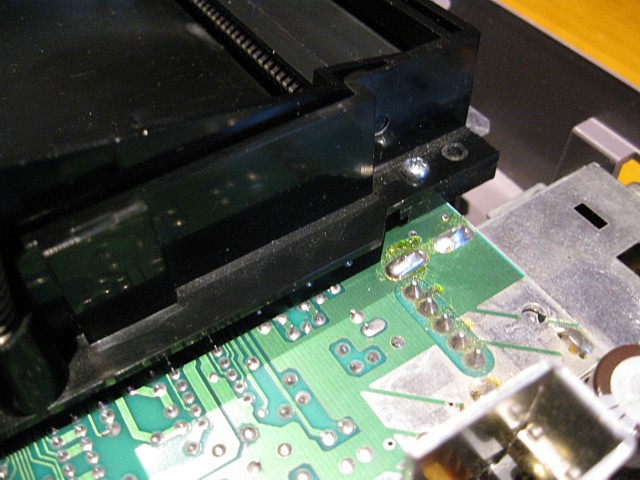
When reaffixing the cartridge guide, the two longer screws go through the PCB into the mounting posts underneath.
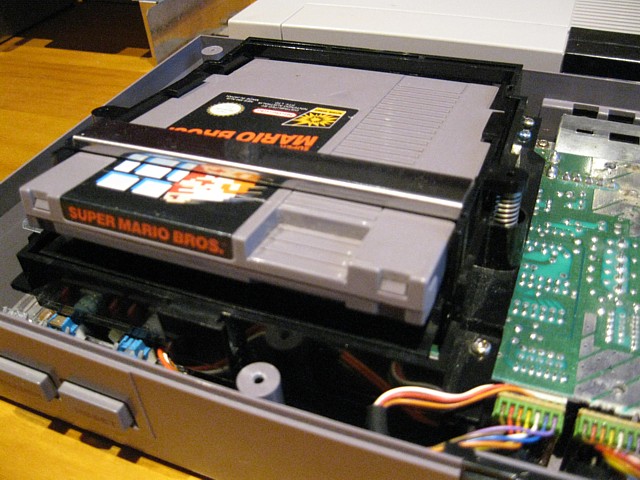
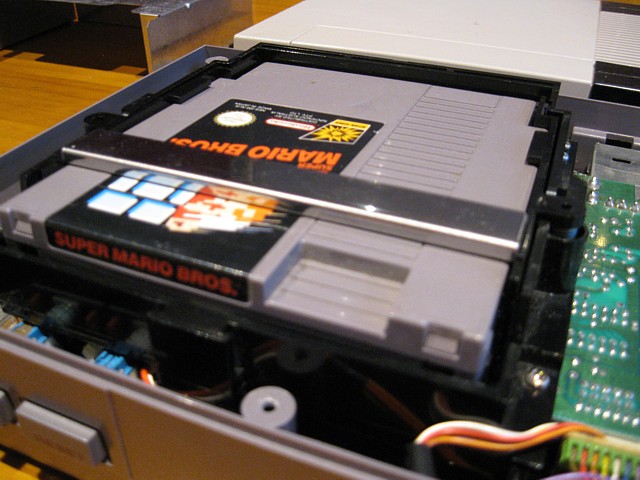
Once all the screws are in place retaining the new connector and cartridge guide a known cartridge can be inserted and latched down to check the action.
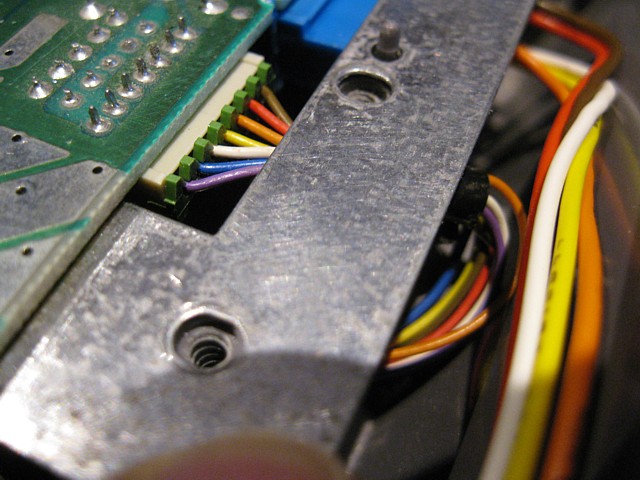
Before refitting the upper shield plate, check the Player 2 control cable is correctly routed and not pinched between the shield plate and mounting posts.
Once the shield plate is fastened all that remains is to reattach the top cover with the remaining six screws and the console should be 'Good to Go!'
NES Games
Hook
Mach Rider
Pacman
Snake Rattle N Roll
Super Mario Bros. / Duck Hunt

Super Mario Bros.
Super Mario Bros. 3
T2
Tom and Jerry
International Cricket
All images and text on this website are Copyright.
Contact: jbtech at telstra dot com